

Connect AWS
Keel reads your AWS account’s IAM settings once a day and checks:
- Root user has MFA enabled
- Root user has no access keys
- IAM password policy minimum length
- IAM users with a console password have MFA
- Keel’s access key is 90 days old or less
The IAM user you create below can call four read-only IAM actions and nothing else.
Time: about 10 minutes.
Before you start
Section titled “Before you start”- In AWS: you can create IAM users and policies in the account. Never use the root user’s keys for this.
- In Keel: you are an owner or admin of the workspace.
Create the policy
Section titled “Create the policy”-
Sign in to the IAM console.
-
In the left menu, click Policies, then Create policy.
-
Switch the Policy editor to JSON, delete what is there, and paste:
{"Version": "2012-10-17","Statement": [{"Effect": "Allow","Action": ["iam:GetAccountSummary","iam:GetAccountPasswordPolicy","iam:GenerateCredentialReport","iam:GetCredentialReport"],"Resource": "*"}]}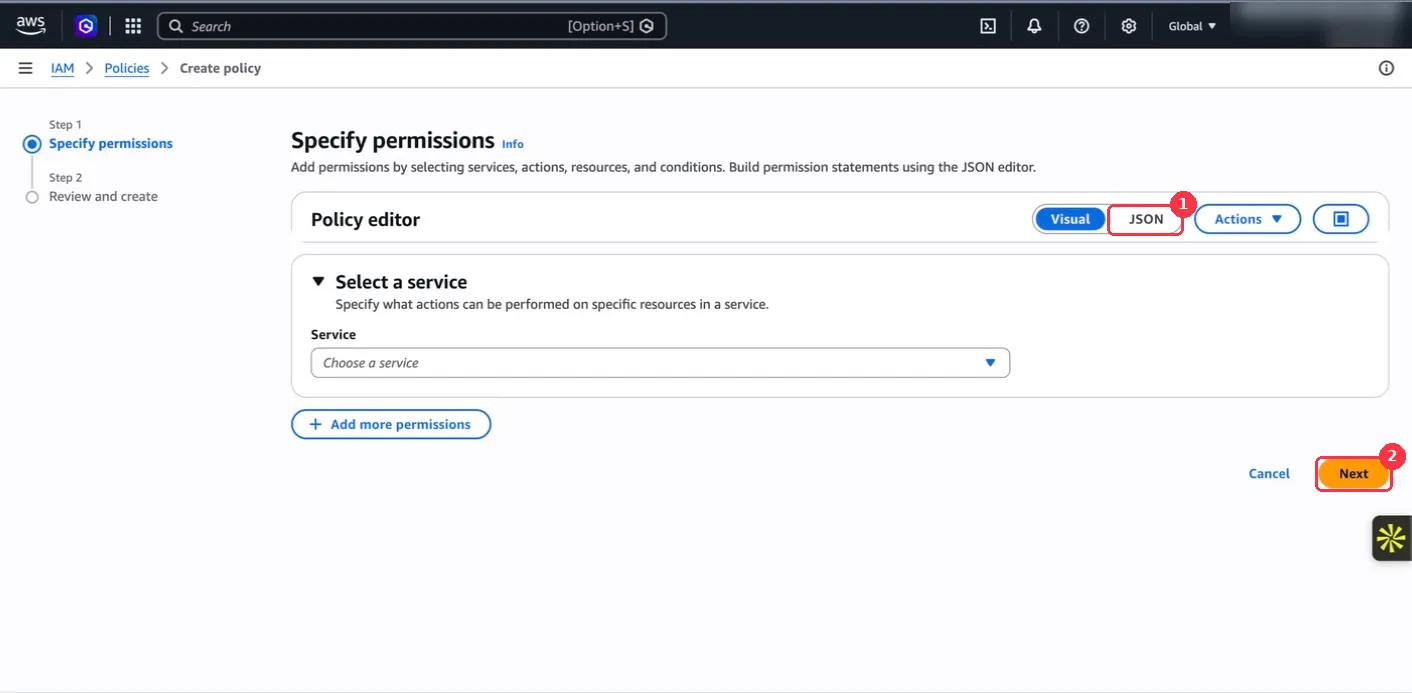
-
Click Next. Policy name:
KeelEvidenceReadOnly. Click Create policy.
iam:GenerateCredentialReport asks AWS to build the account’s credential report. It changes
no setting; it is how AWS hands out MFA and access key status for every user.
Create the IAM user
Section titled “Create the IAM user”-
In the left menu, click Users, then Create user.
-
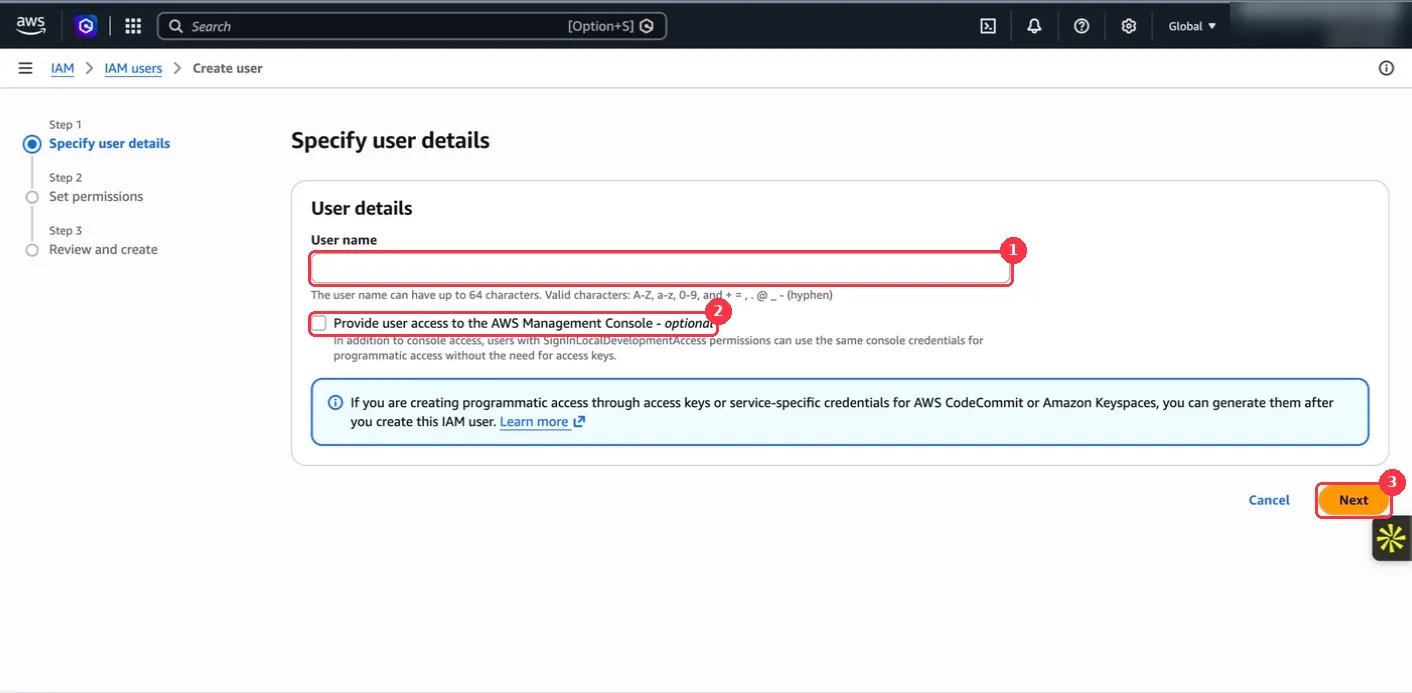
User name:
keel-evidence. -
Leave Provide user access to the AWS Management Console unticked. Click Next.
-
Choose Attach policies directly, search for
KeelEvidenceReadOnly, tick it, and click Next. -
Click Create user.
Create the access key
Section titled “Create the access key”- Click the new user’s name, then the Security credentials tab.
- Under Access keys, click Create access key.
- Use case: Third-party service. Tick the confirmation and click Next.
- Description tag value:
Keel. Click Create access key. - Copy the Access key and the Secret access key. AWS shows the secret only once; you can also click Download .csv file.
While you are in the console, copy your 12-digit Account ID from the account menu at the top right.
Connect it in Keel
Section titled “Connect it in Keel”- In Keel, open Integrations, find the AWS card and click Connect.
- Under Credentials, fill in:
- AWS account ID: the 12 digits, with no dashes.
- Access key ID: starts with
AKIA. - Secret access key: the secret you copied.
- Click Save connection.
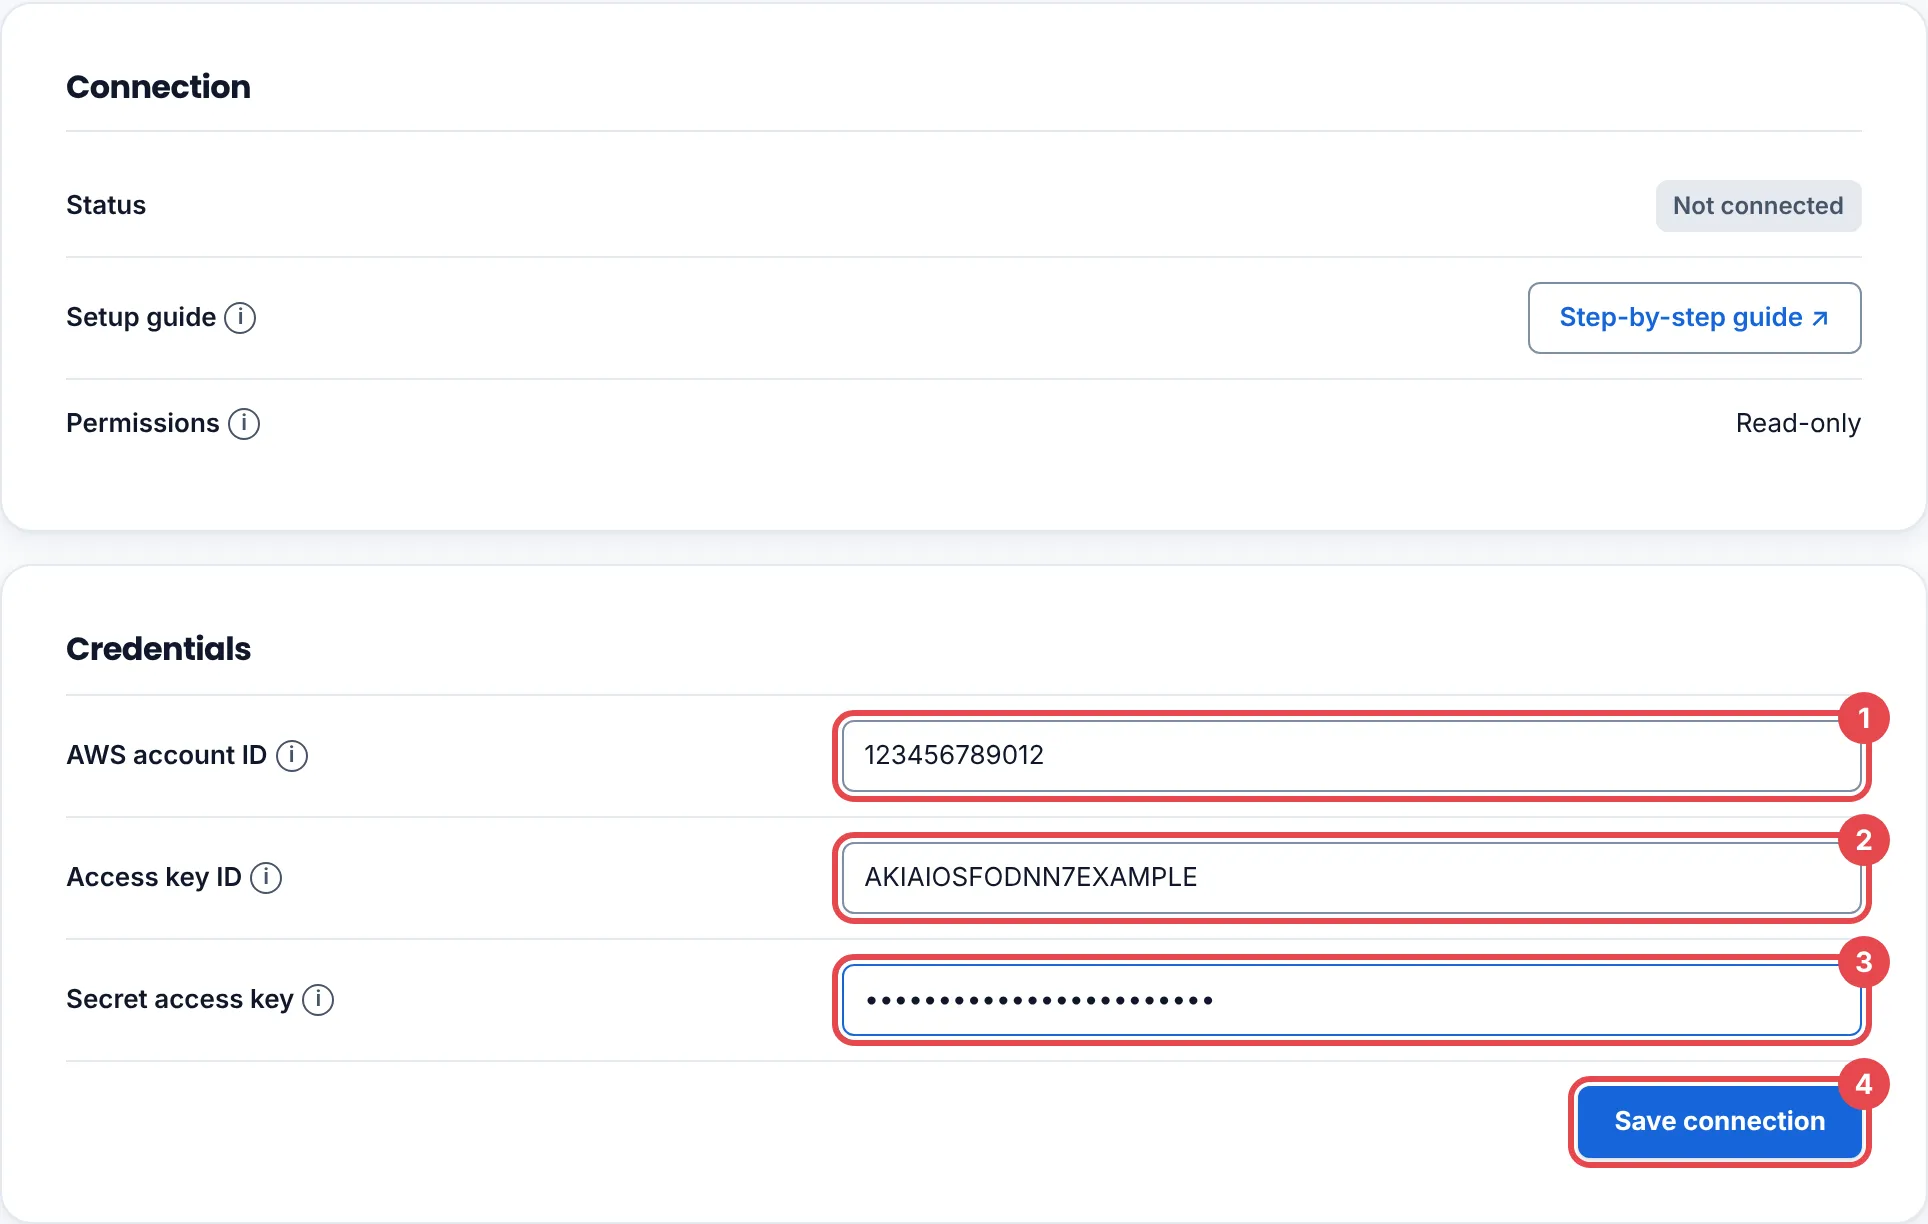
Keel confirms on every run that the key belongs to the account ID you entered.
See the first findings
Section titled “See the first findings”Open the Findings tab and click Collect now, or wait for the next daily run. If AWS has not finished building the credential report, the check reads N/A with The IAM credential report was not ready. The next collection will read it.
Troubleshooting
Section titled “Troubleshooting”| What you see | What to do |
|---|---|
| Check the connection details and try again. | The key belongs to a different account than the ID you entered, the secret was not copied whole, or the policy is not attached. Open the user’s Permissions tab and check KeelEvidenceReadOnly is listed. |
| Keel’s access key is 90 days old or less reads Warn | Rotate the key, below. |
| That source is already connected to another Keel workspace, so it was not connected here. | One AWS account can be connected to one Keel workspace. Disconnect it there first. |
Rotate or remove access
Section titled “Rotate or remove access”- Rotate: on the user’s Security credentials tab, create a second access key, disconnect and reconnect in Keel with it, then Deactivate and Delete the old key.
- Remove: click Disconnect in Keel, then delete the
keel-evidenceuser in IAM.